Hey there! 🎉
Are you a web developer looking for a way to streamline your workflow?
Look no further than Visual Studio Code (VS Code) and its Live Server extension!
With this dynamic duo, you can preview changes to your code in real-time, making development a breeze.
But did you know configuring a local IP address can take your experience to the next level?
Imagine testing your code on multiple devices within the same network – pretty cool, right? 😃
We’re here to guide you through the process step-by-step and help you set up the Local IP For Live Server Extension In VS Code.
Let’s dive in! 🚀
Step 1: Install Live Server Extension (obviously)
Before starting, ensure you have Visual Studio Code installed on your machine. Open VS Code, navigate to the Extensions view (Ctrl+Shift+X), and search “Live Server.” Install the extension by Ritwick Dey.
Step 2: Create a Project or Open an Existing One (needed)
Create a new web project or open an existing one in VS Code. Open the folder containing your HTML, CSS, and JavaScript files.
Step 3: Open the Settings Page for Live Server Extension
Quick Method to Open Settings for Live Server
- open VS Code –> On the left-bottom corner click on the
gear icon(Manage button) - next, Click on the
Settingsoption.

- Search
@ext:ritwickdey.LiveServeron the search bar.

- Scroll Down, find the
use local IP as hostsetting, and Check mark the Box.
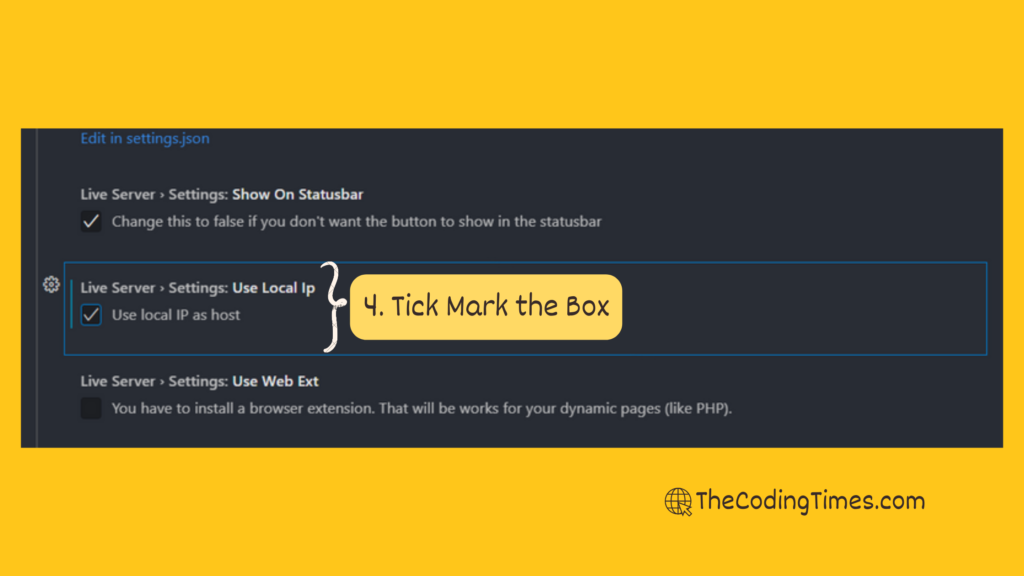
Congratulations! 🎉 You have configured the Local IP for the Live Server Extension in VS Code.
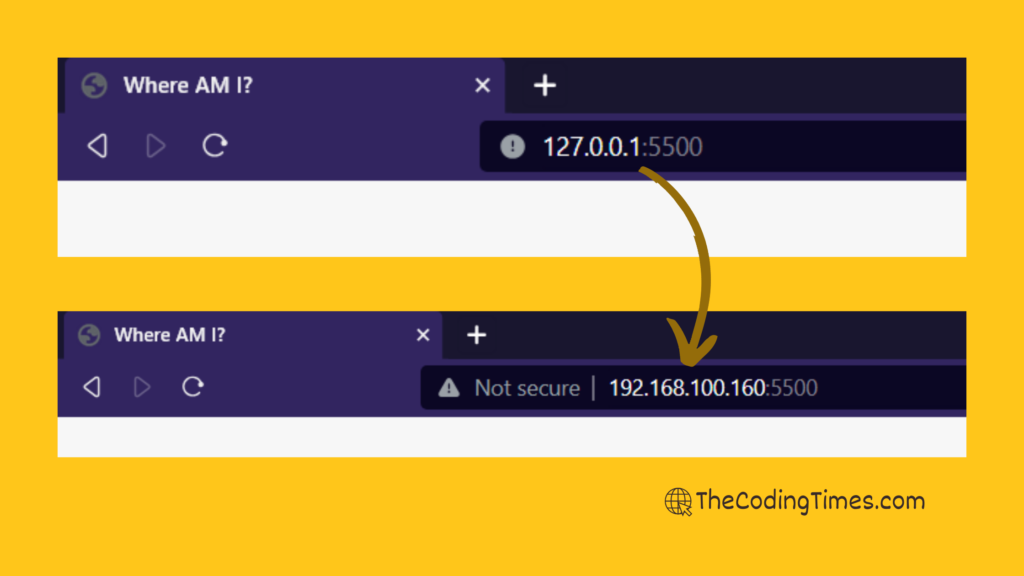
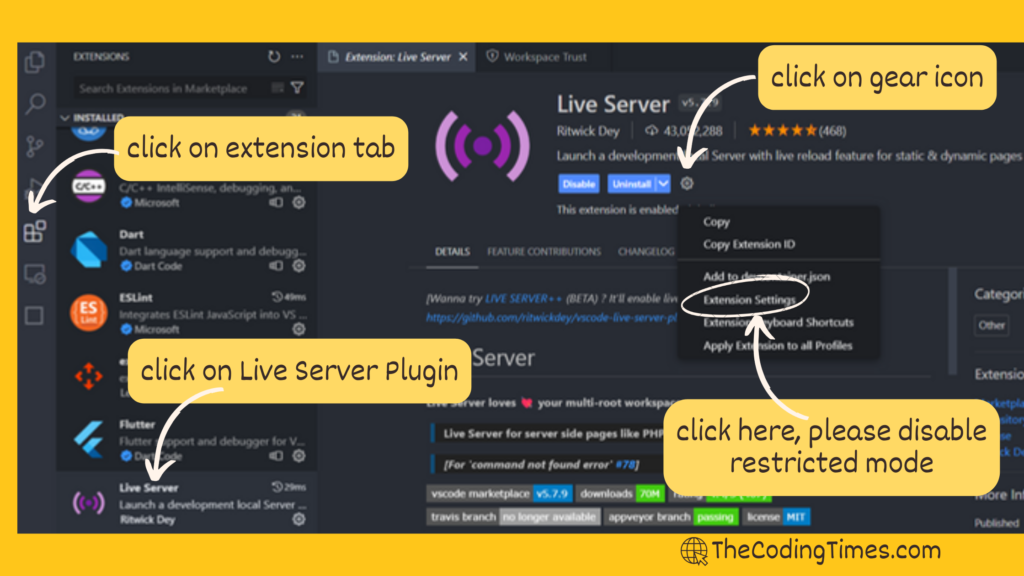
Alternative Method to Open Live Server Configuration
- Open the Extension Tab –> Install and Click on “Live Server” Extension.
- Click on the gear icon on the Extension Page –> click on the
Extension Settingsoption.
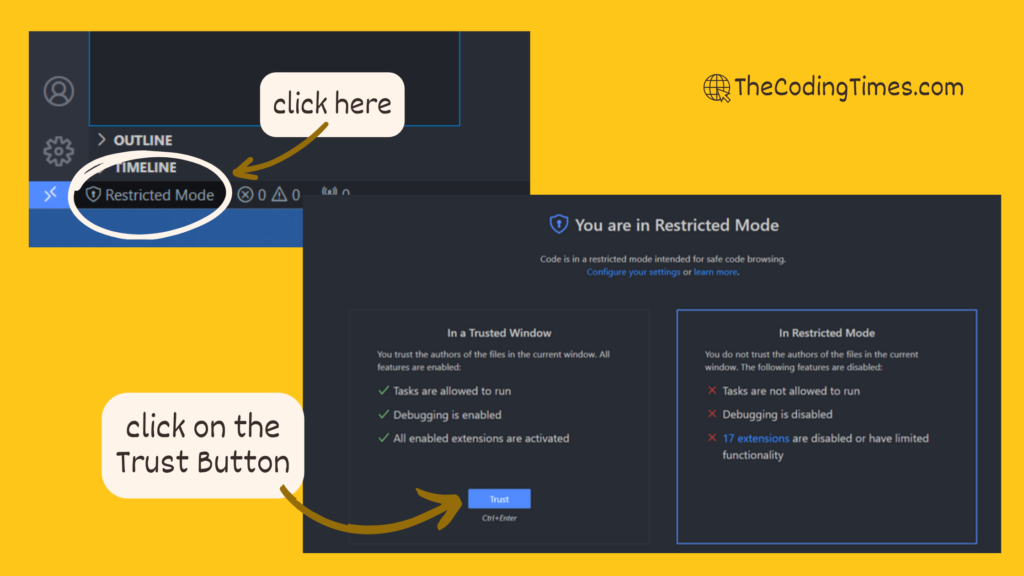
Troubleshoot:
- It would be best if you disable the
restricted mode, before starting the tutorial.
In conclusion, setting up a local IP for the Live Server Extension in VS Code can significantly enhance your web development experience.
By following the simple steps outlined in this tutorial, you can easily configure your local IP and start testing your code across multiple devices within the same network.
This method offers a streamlined and efficient workflow, allowing you to preview changes in real-time and expedite your development process.

If you enjoyed this tutorial and want to stay updated on more tips, tricks, and guides to streamline your web development workflow, please consider subscribing to our newsletter.
We appreciate your time and interest in our content.
Thank you for reading!

